


Setting up a service account for uploading to Google Drive with SvelteKit


Note: all credentials have already been destroyed so there is no need to let me know to not share credential information online.
I just finished working on a project for a client/friend in which she wanted to have a page where she could have forms available for her own clients to download which they would then upload, also on her site. The site itself is a static site deployed to Netlify and built using SvelteKit, so right away I was going to be building this functionality in a server route.
The next decision that had to be made was the file storage. S3 is an easy place to handle static content, but my friend isn't a technical person and setting up Amazon IAM for a non-technical person, as well as assigning access within IAM, is no walk in the park. We had already been sharing files and such using Google Drive so I figured this would be the best place to handle this functionality going forward.
Google Drive API
Enabling the API
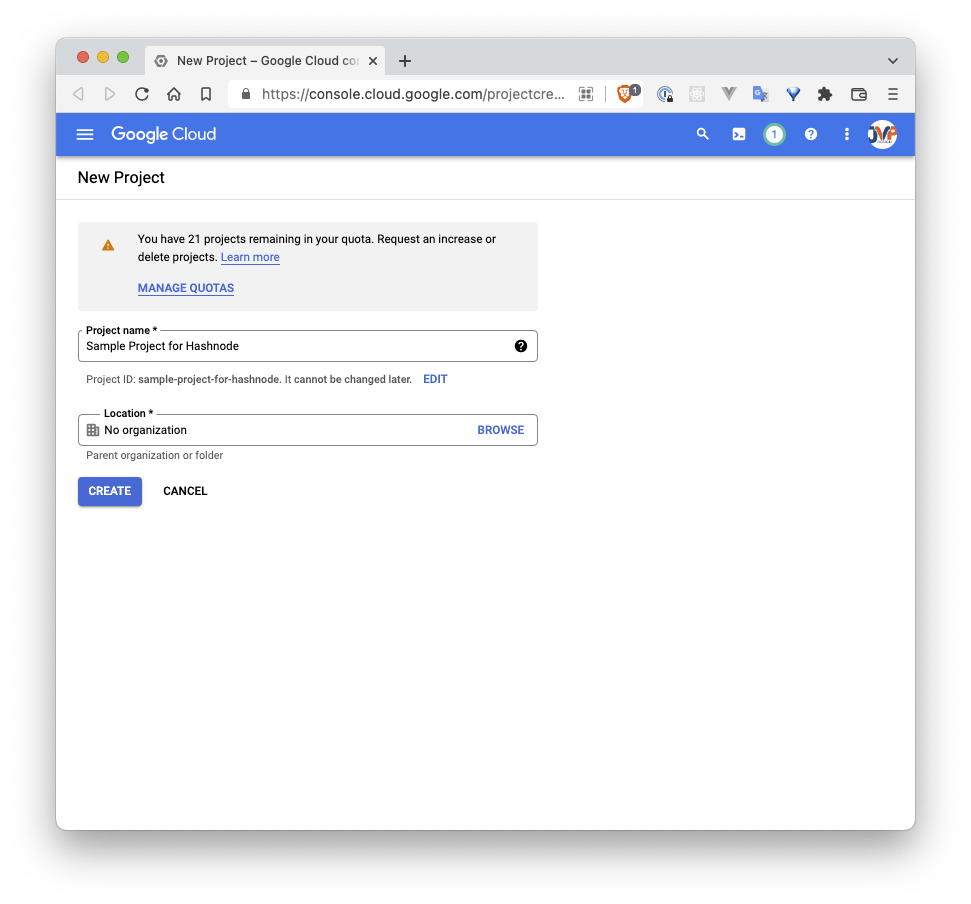
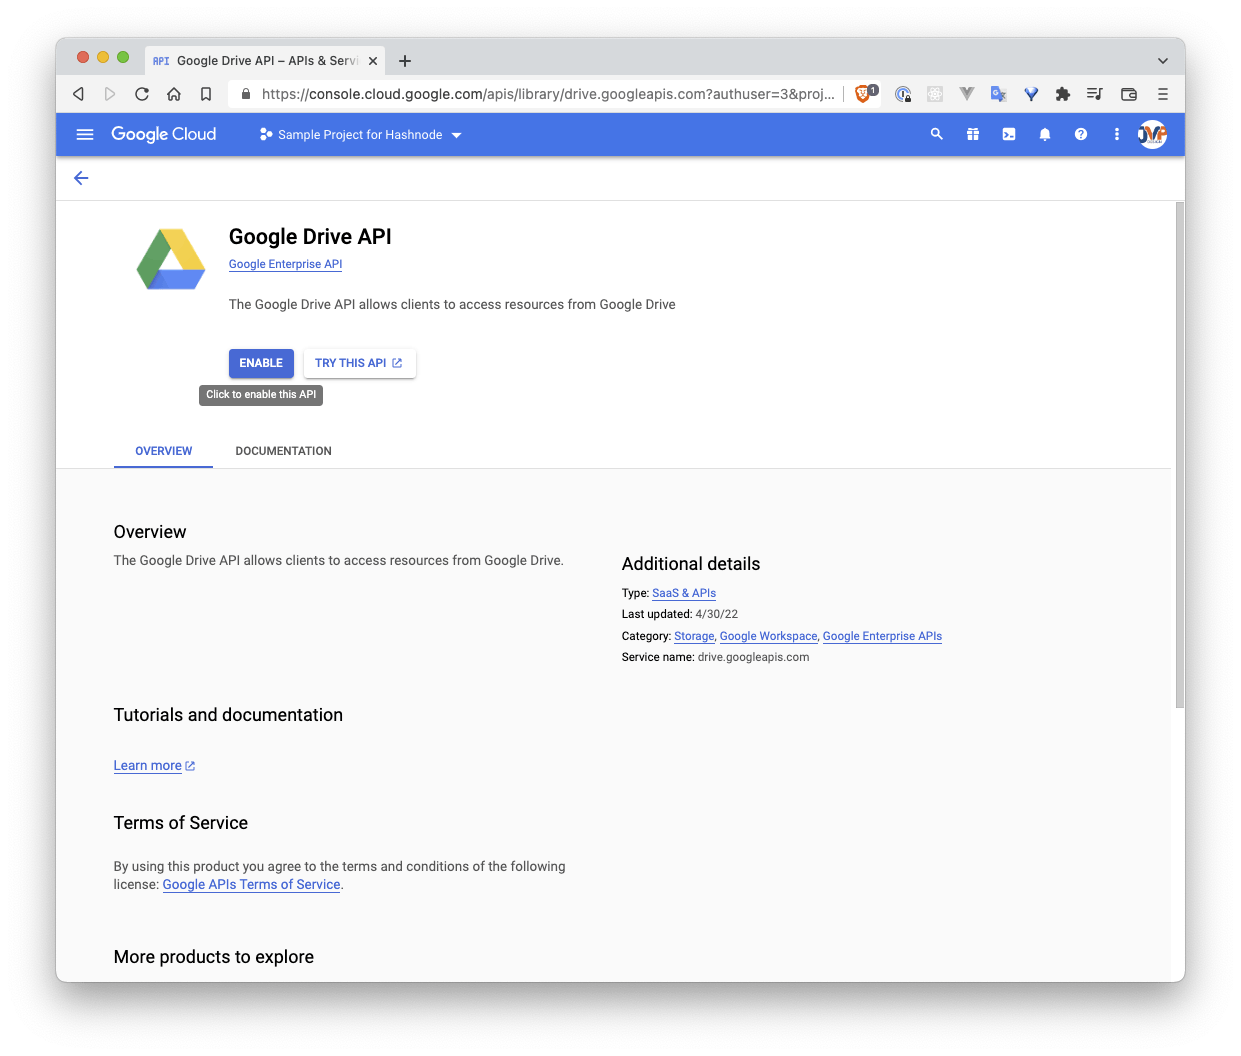
The first thing we need to do is enable the Google Drive API for this project. To do this, first create a project and call it whatever you like.
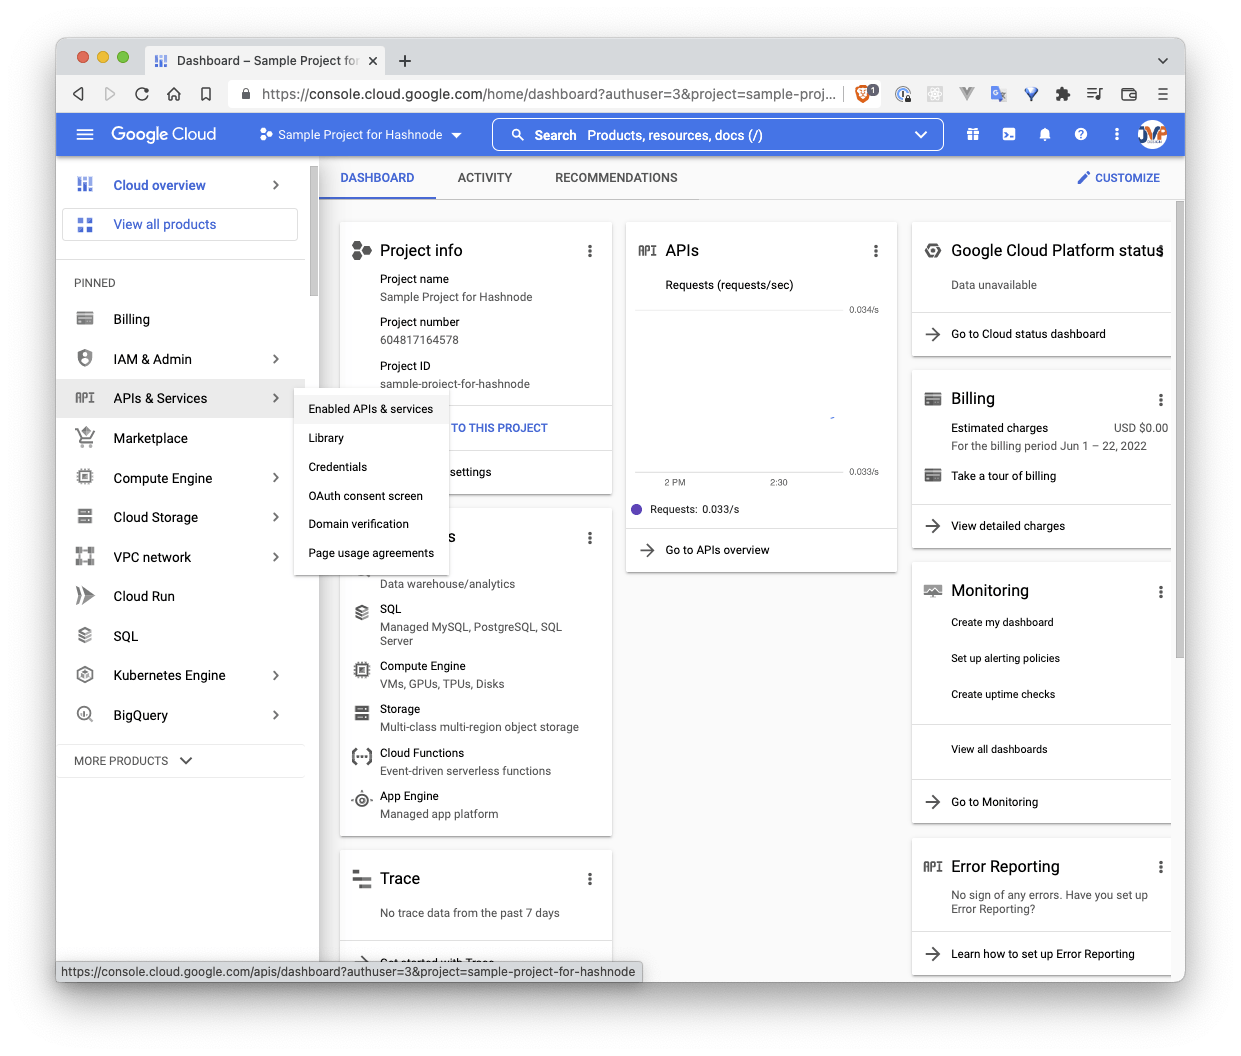
 Then you'll go to the left menu and hover over "APIs & Services" and click on "Enabled APIs & Services"
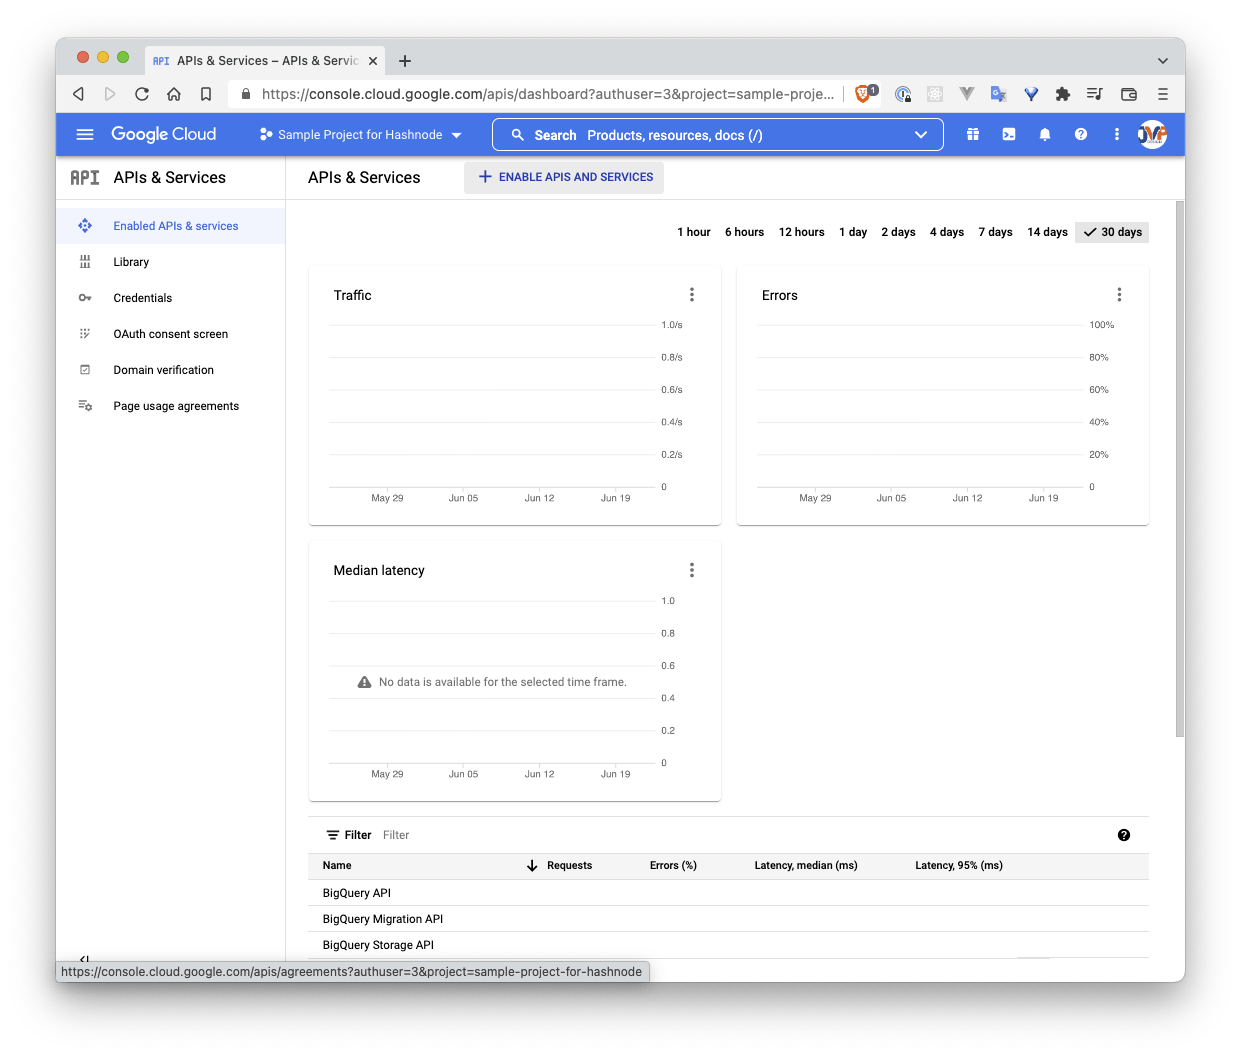
 After clicking on this, you'll click on "ENABLE APIS AND SERVICES"
 and search for the Google Drive API. Once you find it and click on it, you then click the button that says "ENABLE".
 Once this API is enabled you'll need to set up credentials to access the API.
Setting up a service account
If you go into Google's developer console, you can find a quickstart for Node.js for the Drive API. The authentication needed for this quickstart is a service account.
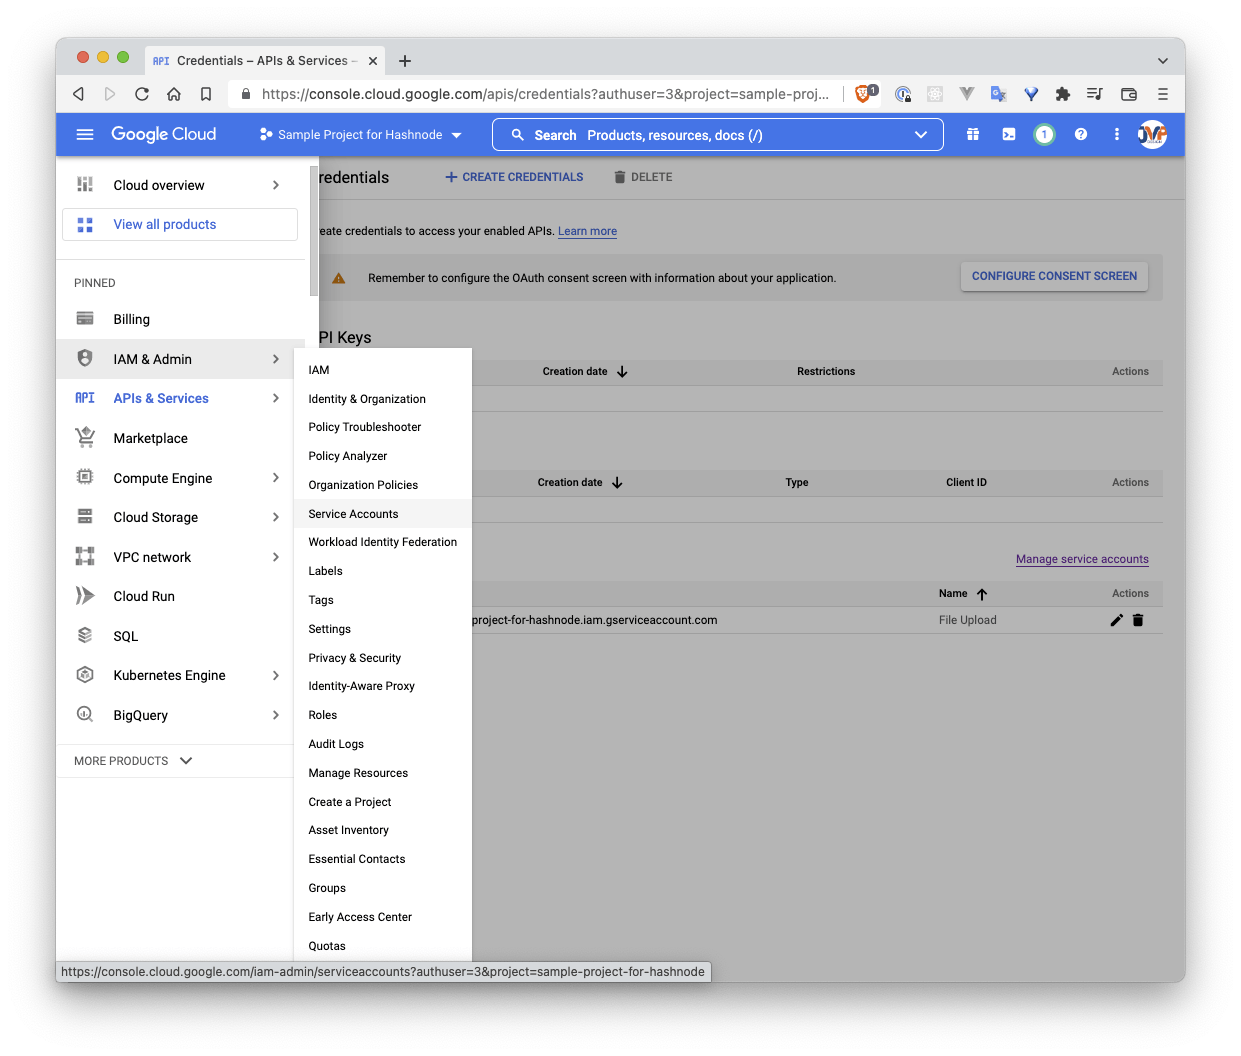
To set up a service account, open the left-hand navigation drawer, hover over "IAM & Admin" and you will see an option for service accounts
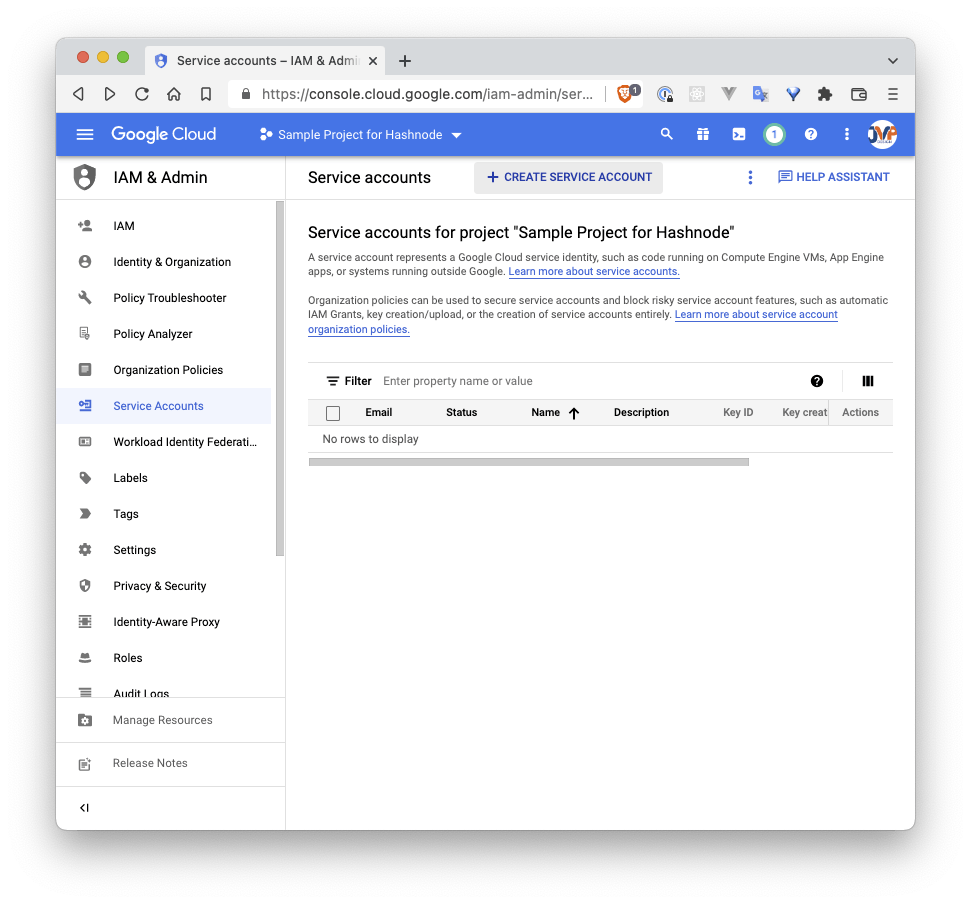
 You will then want to click on "CREATE SERVICE ACCOUNT" at the top of the page
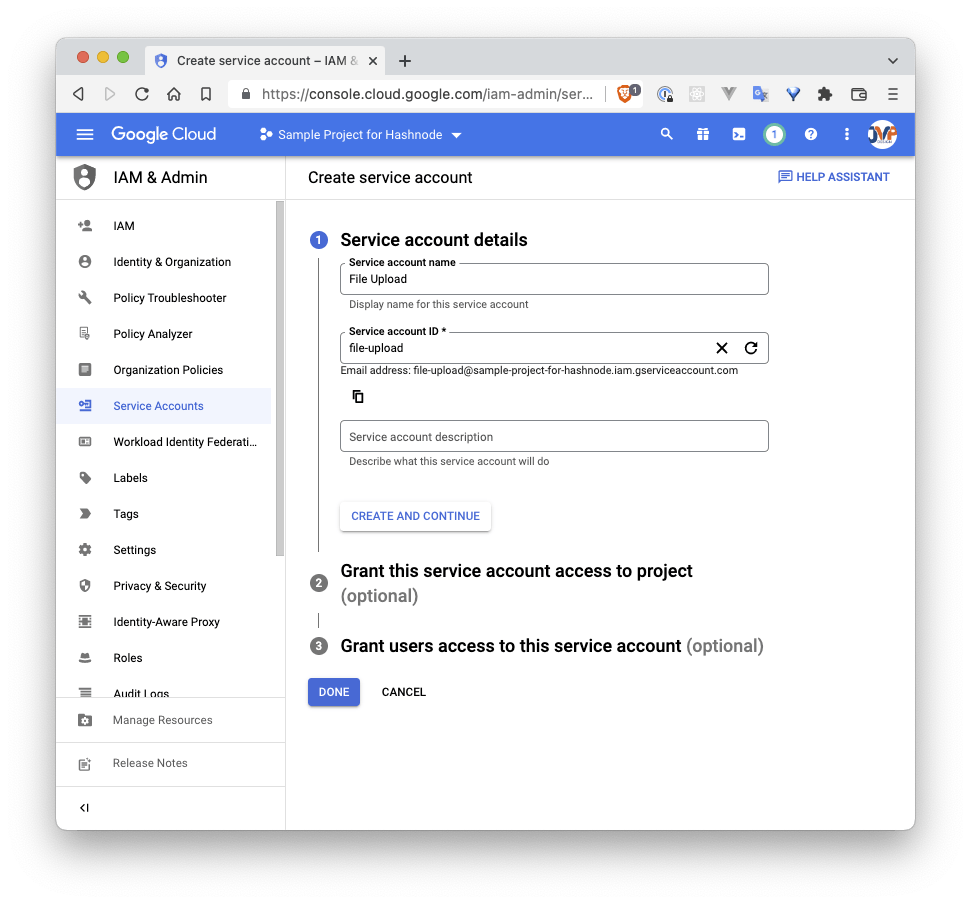
 and name it whatever you want (I'm choosing to call it File Upload). Then click "DONE"
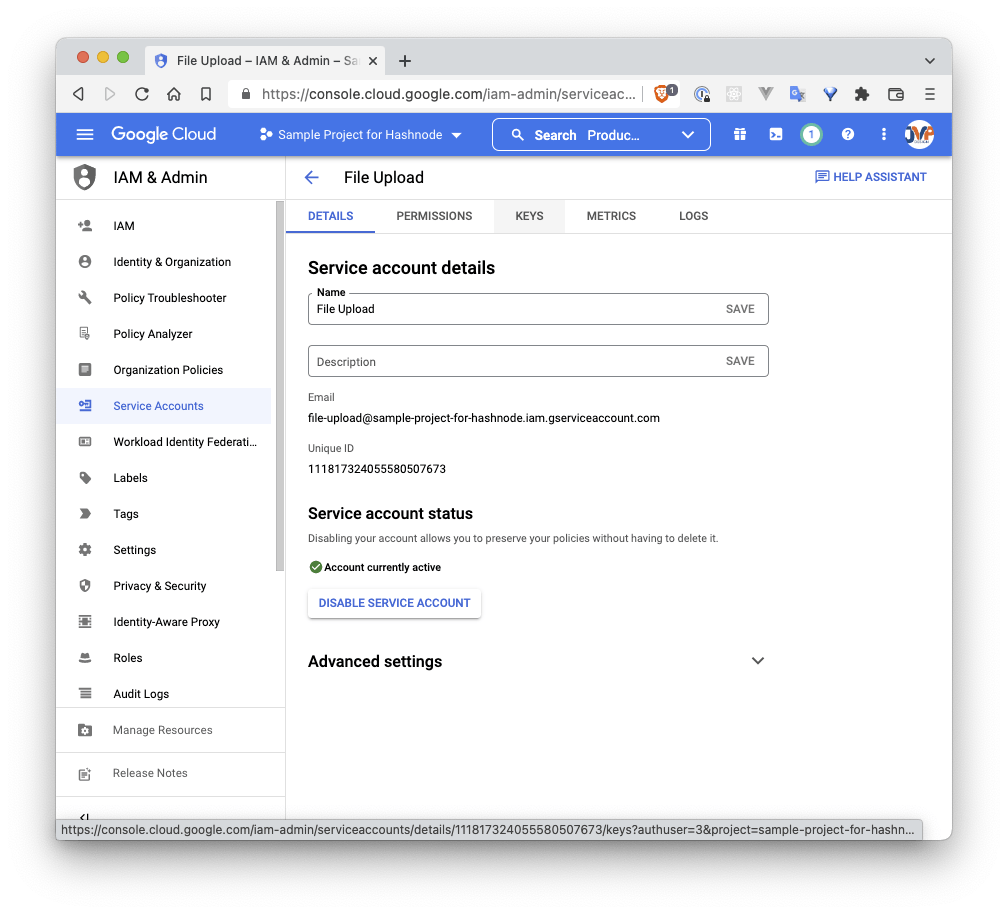
 Then we'll be directed to the list of service accounts for the current project, where we will click on the field in the "Email" column
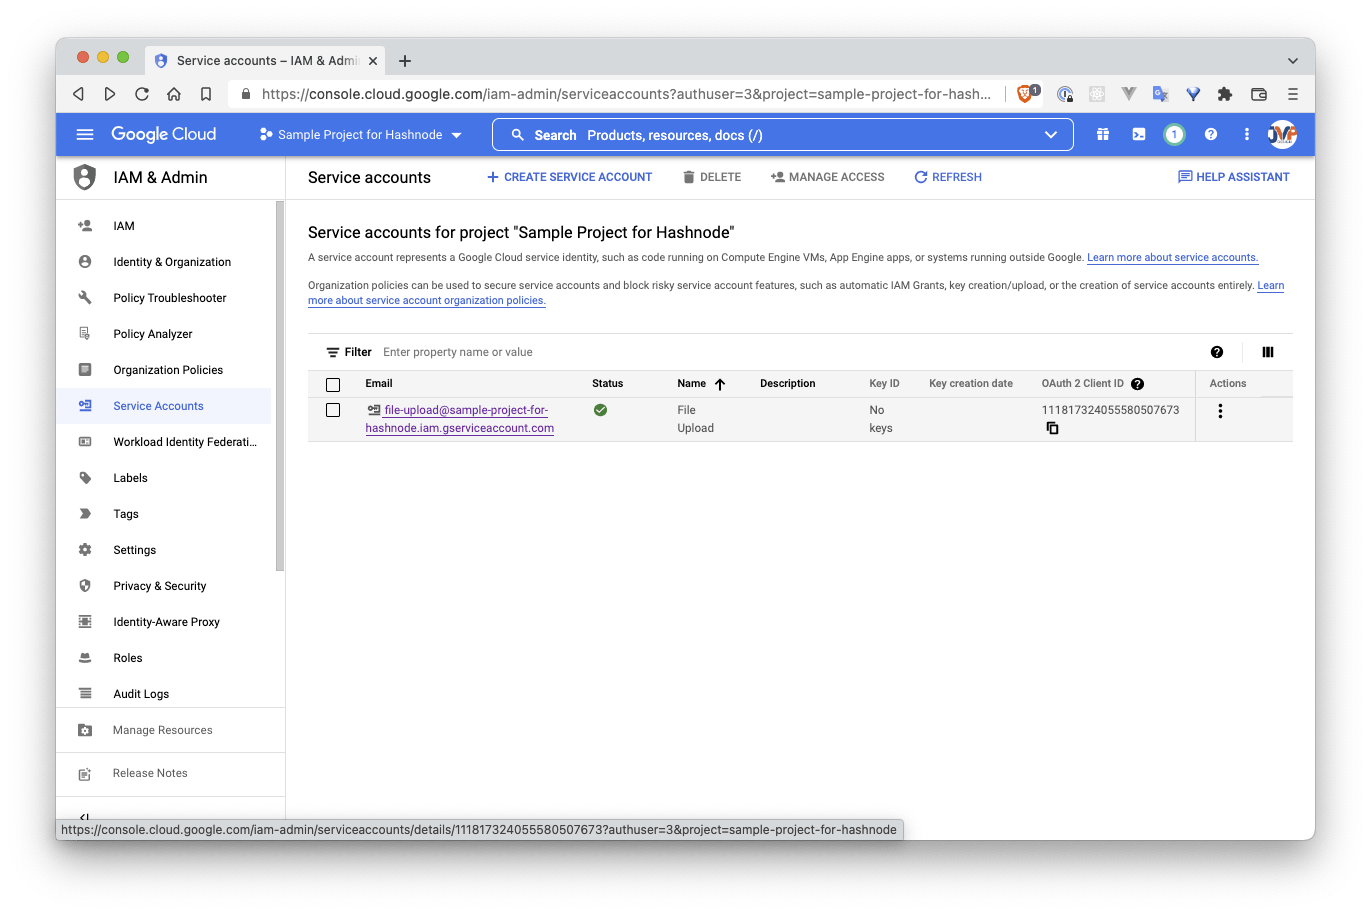 Once here, we will click on "KEYS" in the sub-menu at the top of the page
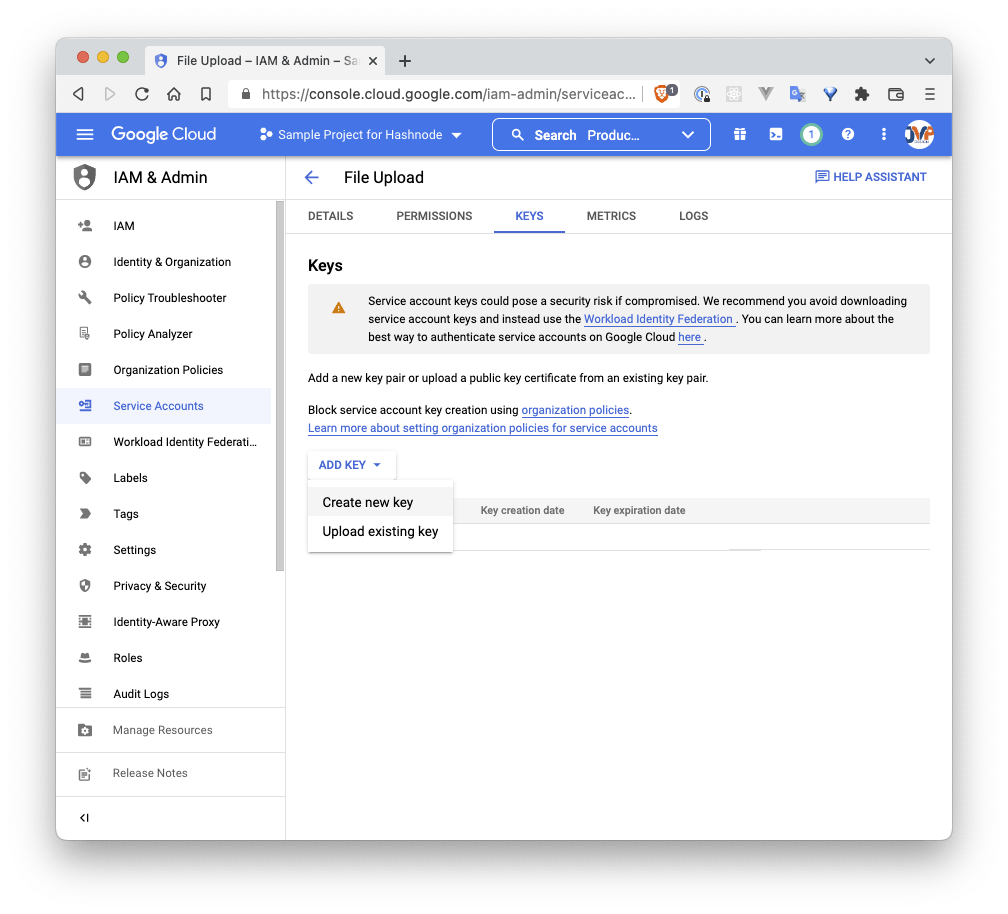
 Then click on the "ADD KEY" dropdown menu and click on "Create New Key"
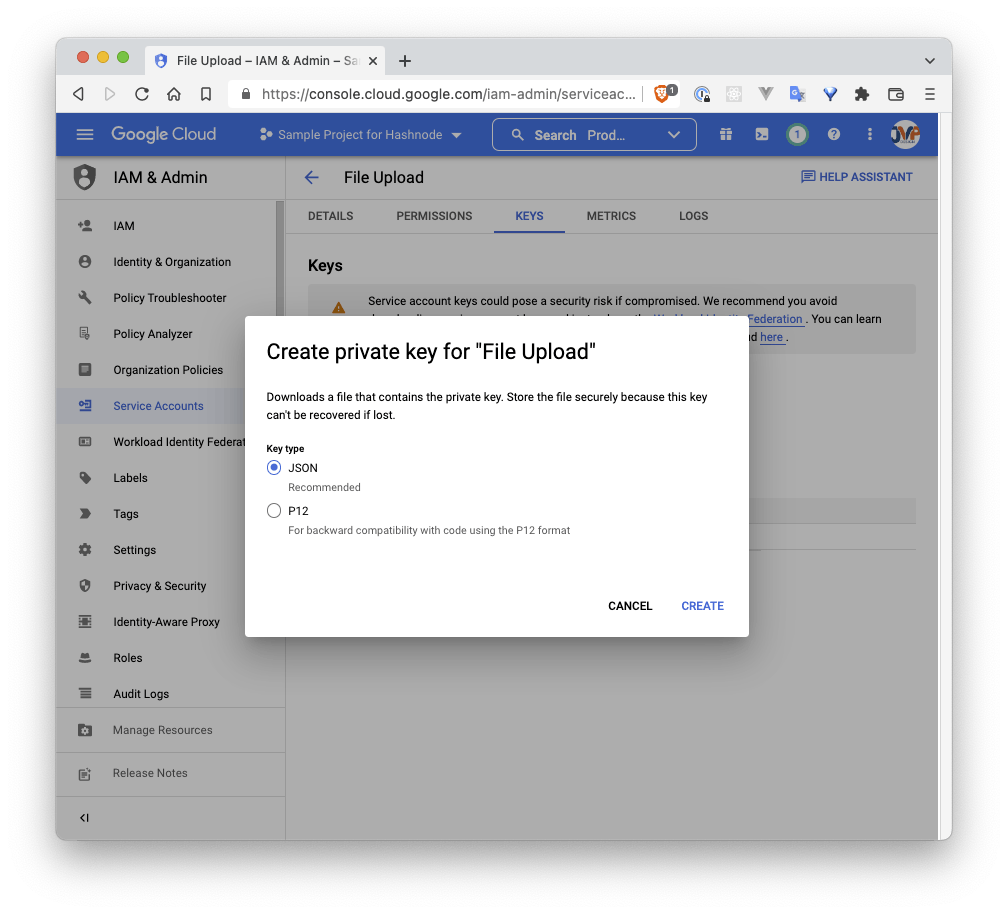
 Make sure the JSON Key type is selected and click on "CREATE"
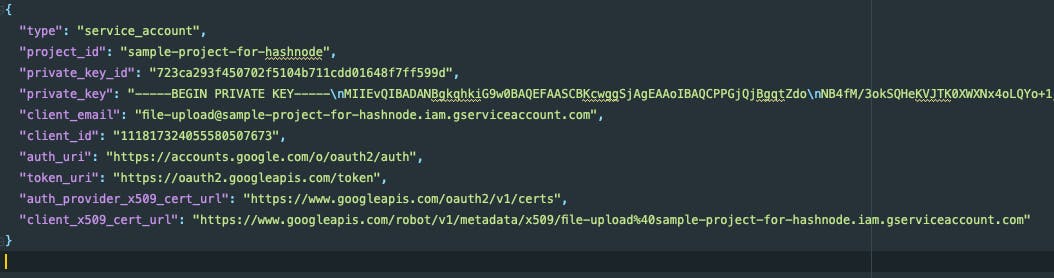
 If we then open the resulting
 .json file that is downloaded it will look something like
Storing the .json file
If we were using this service account for a generic Node.js backend project we could just use the file as is. Since I want to deploy this project as a static site in Netlify, though, I'm unable to upload an entire .json file.
I tried stringifying the file to just save it as an environment variable that I would then parse and use, but AWS Lambda has a 4KB limit on environment variables and this stringified JSON file goes over that limit.
Encrypting the file
There is a very helpful article on Vercel's support site that describes encrypting the file and uploading the SERVICE_ENCRYPTION_IV and SERVICE_ENCRYPTION_KEY values as environment variables. Since the data itself is encrypted you can save it in your code and commit it to GitHub and then instead store the decryption information as environment variables.
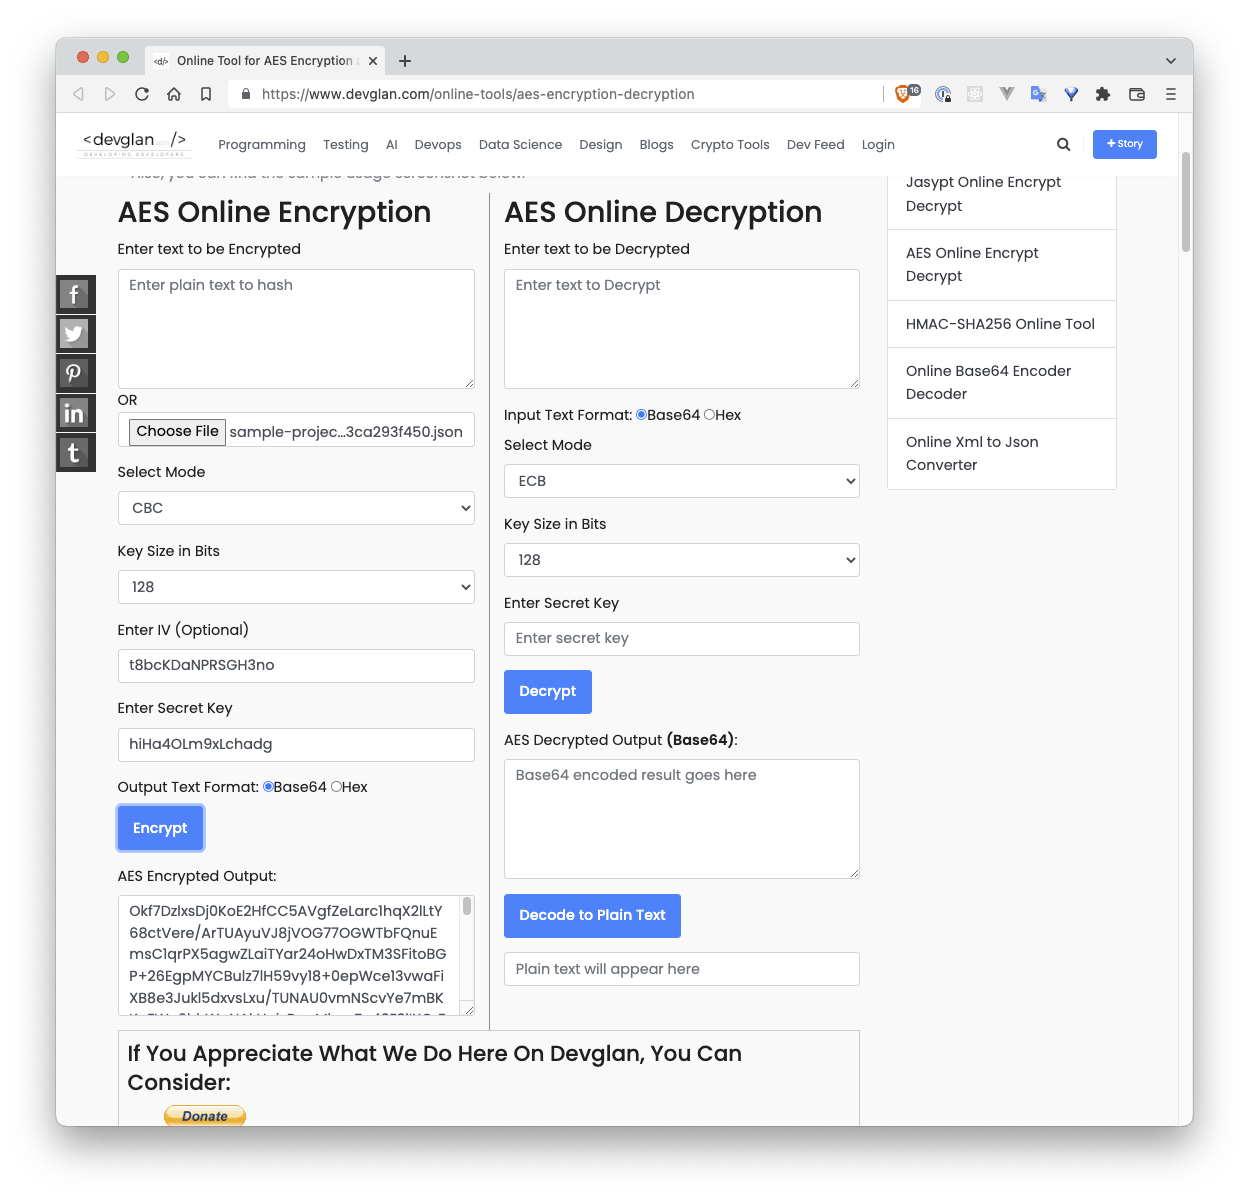
So, the first thing we need to do is go to a site for AES encryption and upload our recently saved .json file. Then we select CBC mode, and enter two 16-character strings, generated from random.org. We'll save the first one as the IV value and the second as the KEY value. Make sure to save them in a safe place as we'll use them later (this is likely a .env file in your project's root directory).
Then click on "Encrypt" and you should get the following
Storing the relevant information in our project
We then want to create a service-account.enc.js file in the /src/lib folder, and in that folder we'll simply write
export const encrypted = 'Okf7DzlxsDj0KoE2HfCC5AVgfZeLarc1hqX2lLtY68ctVere/ArTUAyuVJ8jVOG77OGWTbFQnuEmsC1qrPX5agwZLaiTYar24oHwDxTM3SFitoBGP+26EgpMYCBulz7lH59vy18+0epWce13vwaFiXB8e3Jukl5dxvsLxu/TUNAU0vmNScvYe7mBKKuEWn6hhW+NAkHojsB+pMkwsZa43E3lIXOrF9nk/QmSGBEVuPOwroQhUw47vx6b2oXZ9zdcZVBSEQUCM9/ZIHD/oqfAG1u8A494H4+Chh4fxpud+752Sm3Z+Tp7yWF4/nFlxfPohbrLeLcRav/r7r8xRLNkA3YGEQQFh1tArmNa0GjiFGcH7ymboINFIVJaBXVc00XPJuaQ1p6MmHbHXJIxgaGvKEmxMsFef35Xi+rRlZICZmp0/ss/i/3yV0wLatobN0UzULjIZj9gfIlRM+3aNOW5uqYcVUBOcyn49cw2H648sEkyTs8Z4vLfJiN3orjvIPTrxdSfO8FagFcV2P/pTZicfsVzCbN3a8xOXRSsxOktnWCKZHXuXzog8I6RLrkznzVDSxjPm54uXrGPWTUPw+X6EG0RvSeV1w3A4F/FVBedJT/sm6mcfF1yj8HP+lT9qvujF7lpkqYaLnmoBo7FkbdFZq6Ra+F79VcdWOx4aC5a+0ibu2q2pnQ9Fiw58cV87tRefxrCNaW+/JrOlpZ+mmCgyL/1zJpFabzQ0sCIzx1a5Q7FHocNttX8pSwjSgD3cM8ZgKCPyO6UBCmFzfgJ+AY2ksqYDKxdoZh84JHFyKmzmbb20qeQF2M6Ux+lumxJYyQlC6MfFE95g5HHXtdOGpYrB83LrcK9OShjcRkCMoIqOHlG8CbyhBAVQgsHzB09HzTkMgO0x/sfnvryNb7r0j7hgDFFiWAeIr/0qXIOjOJ3npF/E3OTOZ8Q8dTuDQ75Wd3fClvkq1aYBnsXSjZRWGl4q38+MFjU4+yb+C4Tfk37Yd+x/4b18ey5g9EkFAiyXQtsZiDVjRIvcvJSiNLtce18Asb874z8pVe0Nui4fFwtRtYJzJoaGnx6BtIeNu0A6U9NJRuqXIbK0wAH4BHwY/sS+rUjxgfr8ag32O4cPIGHlChl2INH/WDHUtYx9O4L32q1ijLxb5Kz73vfJj9bgWVa8fIyDT2U05/BLfTn3fHbDpJR90c+ImpvcPUaD1Df/jJCuBrAR3EPN8r71VgSlQhKsGIgm44TDV1lWyOXPotXoM1BQHeQfOtbyYehufYmaPCEB/L4wcDtiOo4M4qyCYZeOvlsEv63DauNdQahl6hPzuw+V7CSRIwVP4YnaPpoYiGZAw3VrcQO/g0XLaPT2RfT2zq5Yp8sJdgc82imIZTynsnzf1ZaJfW7bToR466RY9SSqHpm92MyqAxbVejv3SAuYG64Y/5yIPh5Dv6ce93kPRI443z4Pv/EIaTpwF1+kzS3iIF+ODc2PtqJu61fWnB4ydXm7iWoMH1kkXpYHaTyqn5pIatowkcQEBvkmNoWKdxlN/mfynAcy117USXujKyXd58sgRSG3vPPXTPPLm0M4H6Aqe9MSR6iuf0YCNjiNI4HWrnlbhNi22Rnv6zO8cSg/B7DS/V1xL4B3eykH5SU67nfm3aidjh/KrR5VGIU0/zSyJ/J9DLi5UpOAqKm3hEAQTFz8rfLV2bTjWU9XpcDghl0UG9rAqYMCFNCj2w8QZPzZx4C42cR+mCevG8w+k7EcXnm6F93yczsOWFClMolGDW+CjbJfQpHkxmmdVxap4PziCZ6p2JU2HDhnoazxrvlshir2OWozfzA94jQ5MKhU6O5ozxELS4n0t9EnjNoS+5FI6hgi8sKNJN1RXjgpcDeiVvp+sLWRT8r/S5tAACYgI23tNR1W7e/oodJxKlTqBADybpTz3NqonLp0WEHZTPeUEcelcvqBsUlCCs46sU/hWFCR0IXLT6rCZjAEeunqNO+4Q78D4WQIzvcGqOvJWDiPqjIhwaj6VI3GoxXLN3Dq0fz395fdl6DB/gPEtuP8P4az7py3ZYEdEBunT4QSEkByT8kwaYSJbPOLoKzFMBiBNfMYofxyiAg6rf0+Mg9BZVvXxAJ4b9HT5+OvwiN/MuiC5rSpOJkmvMPEbmhSztenMbZOtNH9EXLzsCZq2gTe21H+yPXRZztD8N80yFDyNWQzq+FLh8K7h+JNg0E32bs6lp7DcYKmjshCa181lfpk6n9EC9JPusofkco1FNCha7YaKrFQLh3zSXikKgKLhQYJx7CKt12wCXe/9r4ERkuz9mRFFkaz7EqReFETEKv5iCO4RAotUCVSsADKc9ikVuy0h2Jyllt735tLHFZTZh7DCP+NDX7/lbzlKkXrCjaBYkrtb2Wb6KvMaAWTUJpLqs1DbOKiKLBFsIzJK32/+8OrRckqoJL/t7c95U93ct2VA/lQiRU9dvIB/luU7C4r/Kuywh5nI85gqPovvvEzTm2AUChmlzKRrsLznh388c59DjBGX8F7jDEBWJbAPuoCstIRM3z4jOwNFnHCNNktaSNEM9HHmV47k8p6tBsU4rcZG34UsLfyJQQH7Iz7GEkeVRuRfVDcIt6hu+AItSfVoVnsVPF2+2QpmtFzf3qZzNxA5sngtxuqOeUoNZ5WihUocrmbrnQZ6F9eUEaWeCn/qU17tal3vvj2LLOMcwwUAZJM1Exbg94WHdGZEeWGKtCTq8PjxnAw8fNMEO3b3IbrU8WCcfj4BJm/0dy6Uz7V495Lr2B4R6tHIHAwJkBgAlci0FCdLg5/WizXw1HLZmeoaaVzucwp6SoJbSIqfEw7I2h8LNGiWJ/z1wgC8wIiVK3AWqwTi4d6DM7qcCzeKYNhkJOag7qFlM8i0tZTMnyge5EjkG7b0rs9EuWZKiBkaQJIBvNu5L/IAMfXBvQJROO+kFZro6+5bg5iOu9FscX+NwYaEFesOjOuMeDoBvOfGEOnOfY0yPOOal5DjyRiiL+dLsJdkgwOhXdMhh53d7tzzKqcYvCVfPPhkVQCnf2RfL7QKNCR99/lsEMWZxizZBEWvXDuFBbyOfLhdY4fZr1QXzpThVLcmnvNxWU2IviU9uyKI7GRxX69m0jw0Yrbotx2CwOmqT89gwINMf7VHDxMoYtSAxBnw=='
Then, we'll also create a file at /src/lib/decrypt.js that looks like the following
// /src/lib/decrypt.js

import crypto from 'crypto';

export const decrypt = (data) => {
    const algorithm = 'aes-128-cbc';
    const decipher = crypto.createDecipheriv(
        algorithm,
        import.meta.env.VITE_SERVICE_ENCRYPTION_KEY,
        import.meta.env.VITE_SERVICE_ENCRYPTION_IV
    );
    let decrypted = decipher.update(data, 'base64', 'utf8');
    decrypted += decipher.final('utf8');
    return JSON.parse(decrypted);
};
where the environment variables noted before have been saved with the VITE_ prefix, as that is necessary to import the environment variables here.
Finally, we'll need to create a /src/lib/service.js file where we import the encrypted data and the decrypt method and we return an instantiated Google Drive instance.
// /src/lib/service.js

import { google } from 'googleapis';
import { encrypted } from "$lib/service-account.enc";
import { decrypt } from "$lib/decrypt";

const getDriveService = () => {
    const SCOPES = ['https://www.googleapis.com/auth/drive.file'];
    const credentials = decrypt(encrypted)

    const auth = new google.auth.GoogleAuth({
        credentials,
        scopes: SCOPES
    });
    const driveService = google.drive({ version: 'v3', auth });
    return driveService;
};

export default getDriveService;
note: This assumes that you have already installed the googleapis package using npm i -D googleapis.
Summary
Now that we have all of this set up, we will be able to import the service module into any file where we want to use the Google Drive API and instantiate it in a manner like so
import service from '$lib/service';

export async function post({ request }) {
  const drive = service();
  ...
In the next blog post in this series I'll set up a server endpoint to grab a file and upload it to a specific sub-folder in Google Drive itself.